Garage doors usually come with proprietary remotes, which may have drawbacks. This page explains how to replace remotes for the Entrematic Magic 600-2, with the Shelly 1 Gen3 relay and the Shelly BLU Button Tough 1.
DISCLAIMERS:
- Electricity is dangerous, garage doors as well. I don’t take any responsibility if something goes wrong by following those instructions. If you’re unsure, ask a professional.
- Think twice before letting your home automation beeing controlled from the Cloud (someone else’s computer).
- I’m not related to Shelly by any means. Their hardware just checks all the boxes and their tech support is helpful. It’s a lot of bang for the buck !
Analysing the door operator
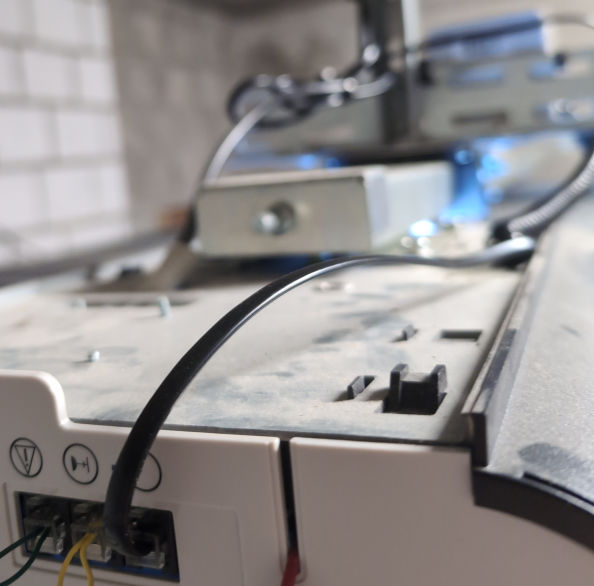
My Entrematic Magic 600-2 has RJ10 inputs at the back.
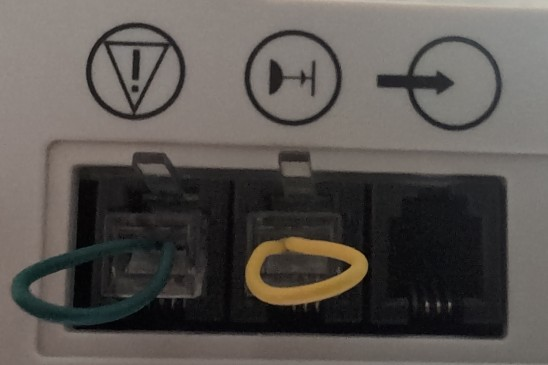
According to the manual:
- RJ10 input 3 is an impulse input, but pinout isn’t provided.
- Terminals 18 and 19 on the PCB are impulse input as well.
Following PCB tracks we see that pins 2 and 3 of the RJ10 connector are linked to the terminals 18 and 19.
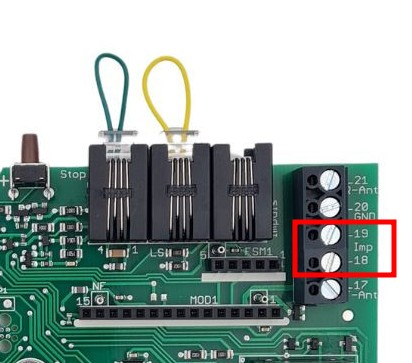
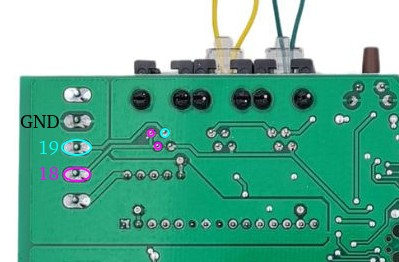
Shorting those two pins (dry contact) controls the door the same way the remote does. A simple relay can be used to control the door operation.
Requirements and hardware selection
For this projet to be successful, following requirements are needed:
- Relay with dry contact, like pressing a wall switch would do.
- Inexpensive, sturdy and reliable remotes.
- Secure communications, as I don’t want my garage to be opened with a simple replay attack. I verified this here.
- Backup access if my remote breaks.
- Offline operation, without Internet. The garage door is controlled only in front of it.
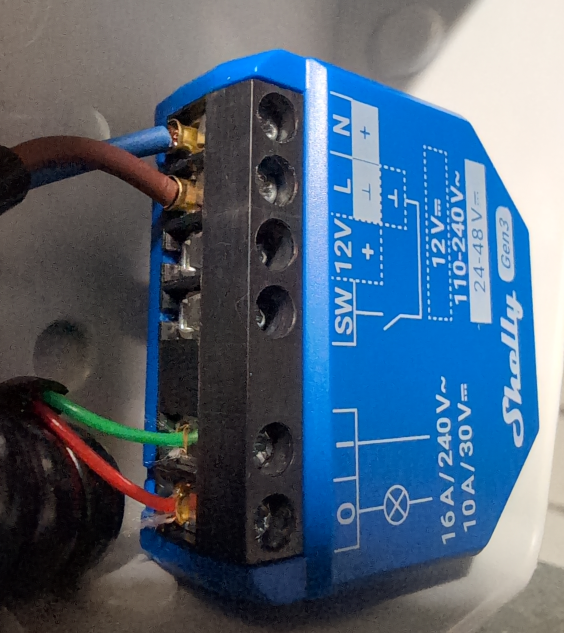
The Shelly 1 Gen3 has following key characteristics: ¨
- Dry contact relay output
- Offline operation, no internet needed.
- Built-in access point with WPA2-PSK, which allows to access the WebGUI (also as backup access)
- Integrated Bluetooth gateway which allows use of BLE remotes
The Shelly BLU Button Tough 1 has following key characteristics:
- BLE with AES encryption (hard to forge messages)
- Message counter in the AES nonce (replay attacks not possible)
- Inexpensive
- Sturdy and reliable (a couple of months of testing do confirm that)
Regarding the RJ10 connector and cable, a phone headset cable I cut did the job.
Setting up Shelly BLU Button Tough 1
The Shelly BLE debug app is needed for that.
Procedure:
- Start the app
- Press the button
- Pair the button the with Pair
- Update firmware with OTA
- Encrypt the button (don’t lose the PIN you set as you’ll need it to re-pair the button)
- Get the information JSON blob with Read and save it somewhere safe. It contains the AES encryption key.
Setting up Shelly 1 Gen3
You’ll need the latest firmware file, a laptop with Wi-Fi and a web browser, and at least one ready remote.
Initial device setup
- Power on the device
- Connect to the open WLAN it just created
- Set up WPA2-PSK and reconnect
- Set a password for the web interface
- Upgrade firmware to latest version
- Enable Bluetooth
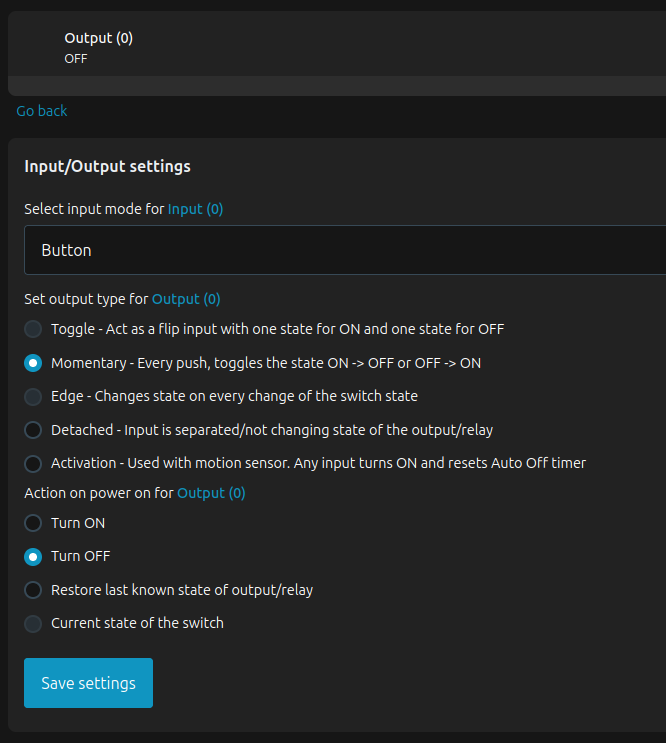
Input/Output Settings
- Input mode Button
- Output type Momentary
- Action on power on Turn OFF
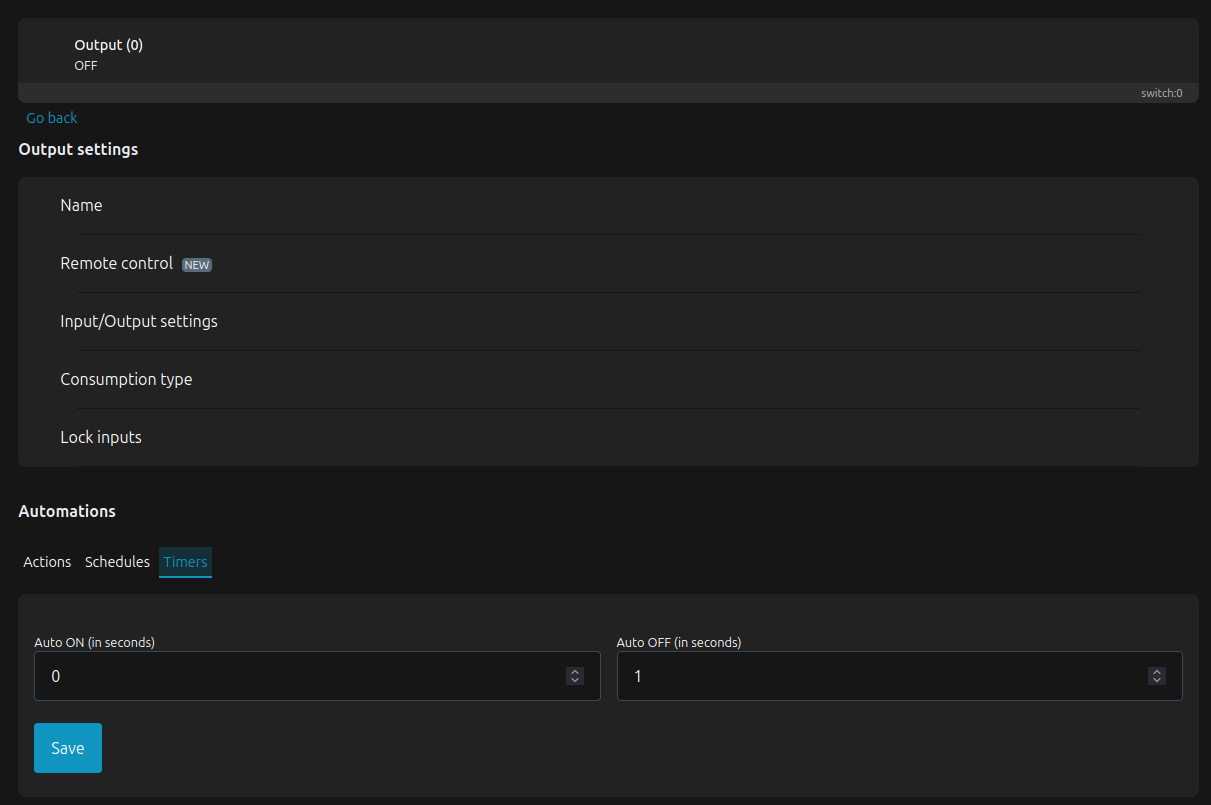
Output automation settings
- Auto OFF after 1 second (like pressing a wall switch)
Add buttons
- Enter button MAC Address
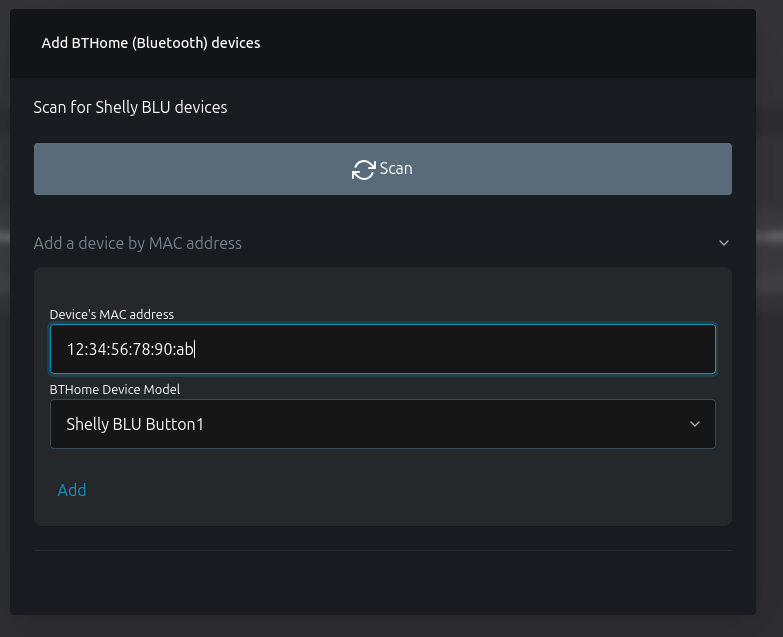
- In the button detail view, enter the encryption key
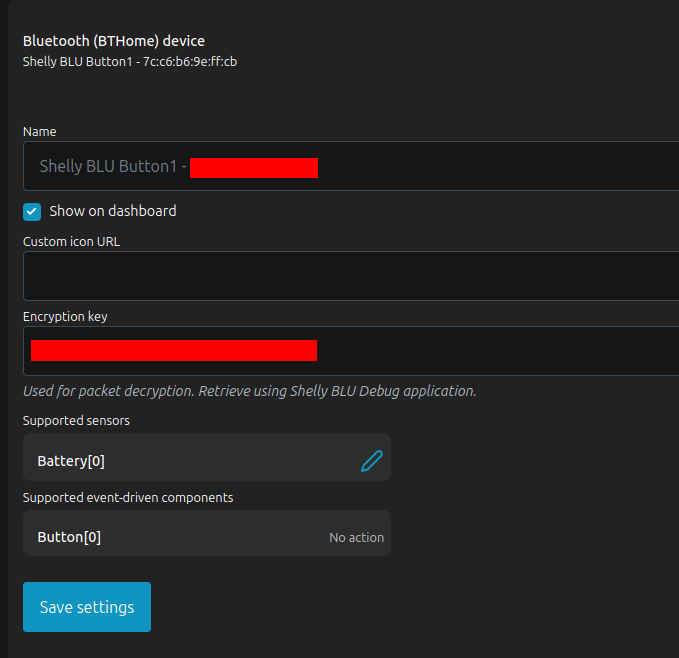
- Create an action for this button
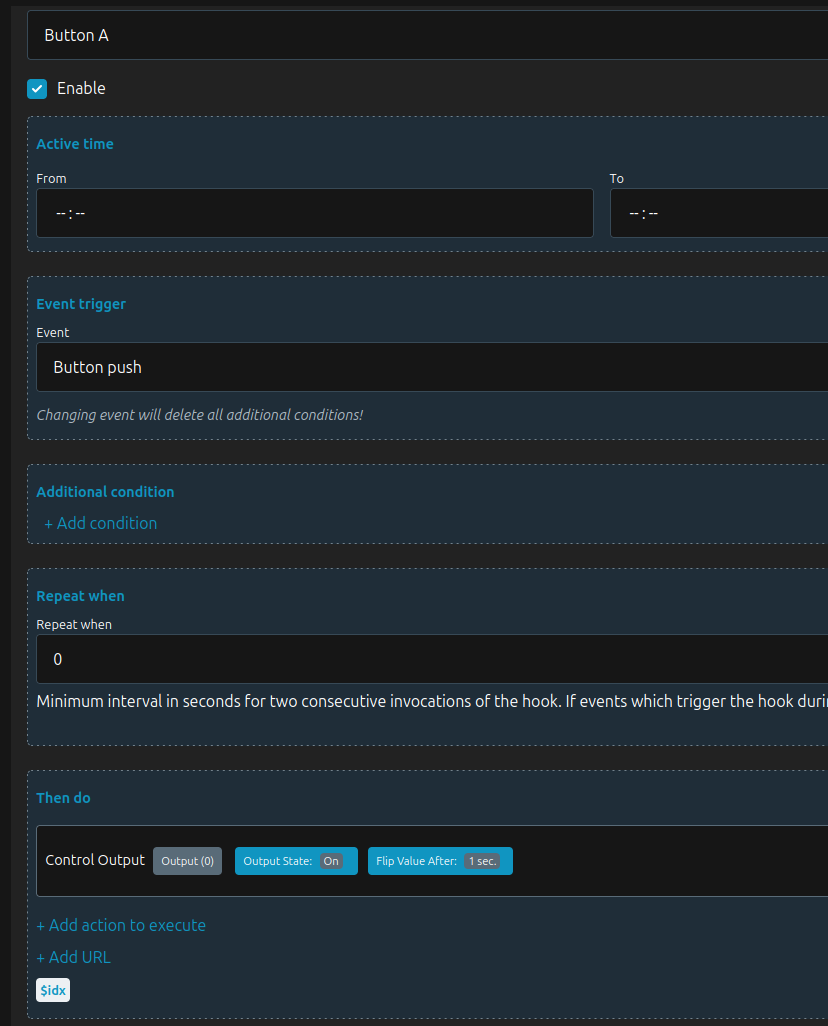
- Press the button : you should hear the relay switch and switch back after one second.
Repeat operation for each button and you’re good to go !